DeepSeek-R1
DeepSeek R1
Introduction
This tutorial should help those that are curious on how to get started using Nosana by deploying a Deepseek-R1-Qwen-1-1.5B model. The advantage of using Nosana with DeepSeek R1 is that it simplifies the deployment process, allowing you to focus on model development and optimization.
Pre-requisites
Required
- Node.JS (Minimum version is V18)
@nosana/cli
Optional
Quick Start
Can't wait to get started? Here's a quick guide to deploying the DeepSeek R1 model using the Nosana CLI.
Using the Nosana Dashboard
For complete beginners, the easiest way to deploy the DeepSeek R1 model is through the Nosana Dashboard. The Dashboard provides a user-friendly interface that will guide you through the deployment process step by step.
Deploy DeepSeek-R1 now on Nosana Dashboard
Using Nosana CLI
Assuming you have the Nosana CLI installed and you have topped up your wallet with SOL and NOS. Read the Nosana Wallet and Funds section for more information.
Setting up Nosana CLI
To get your wallet address, and top up your wallet:
npx @nosana/cli address
Deploying via CLI
Deploy the DeepSeek R1 model using the following command, this will create a deployment on Nosana to run the Deepseek-R1-Qwen-1.5B model, for 60 minutes, on the NVIDIA-3090 Market:
npx @nosana/cli job post \
  --url https://template.nosana.com/Deepseek-R1-Qwen-1.5B/job-definition.json \
  --market nvidia-3090 \
  --timeout 60 \
This will deploy the DeepSeek R1 model on the Nosana network using the specified job definition file. You will see some output indicating the status of the deployment process, and once the job is successfully deployed, you can start using the model right away.
Info
The model will be available for use at the Service URL provided in the output. Which has the following format:https://<nosana-job-id>.node.k8s.prd.nos.ci
Interacting with the Model
Now you can interact with the deployed model using the provided Service URL. Use curl, Postman, or any other HTTP client to send requests to the model and receive responses.
Info
Please note that the following examples need to be adjusted to match the actual job ID. Remember to change the <nosana-job-id> with the actual job ID.
curl
Details
Using curl, we can easily get a response back. Copy and paste this in your terminal.
curl https://<nosana-job-id>.node.k8s.prd.nos.ci/v1/chat/completions \
  -H "Content-Type: application/json" \
  -d '{
     "model": "R1-Qwen-1.5B",
     "messages": [{"role": "user", "content": "Tell me something about Nosana."}],
     "temperature": 0.7
   }'
OpenAI Python Client
Details
You can use the OpenAI Python Client to connect to the endpoint and get started building.
First install the OpenAI Python Client.
pip install openai
Then you can use the following Python code to interact with the model.
# openai_nosana.py

from openai import OpenAI

client = OpenAI(
    base_url="https://<nosana-job-id>.node.k8s.prd.nos.ci/v1",
)

# Use the following func to get the available models
# model_list = client.models.list()
# print(model_list)

chat_completion = client.chat.completions.create(
    model="R1-Qwen-1.5B",
    messages=[
        {
            "role": "user",
            "content": "Explain superconductors like I'm five years old"
        }
    ],
    stream=True,
)

for chunk in chat_completion:
    print(chunk.choices[0].delta.content or "", end="")
OpenAI Node.JS Client
Details
You can also use the OpenAI Node.js Client to connect to the endpoint and get started building.
First install the OpenAI Node.js Client.
npm i -g openai
Then you can use the following TypeScript code to interact with the model.
// openai.js
import OpenAI from "openai";
const openai = new OpenAI({
  baseURL: "https://<nosana-job-id>.node.k8s.prd.nos.ci/v1"
});

const models = await openai.models.list();
console.log(models.data);

const completion = await openai.chat.completions.create({
  model: "R1-Qwen-1.5B",
  messages: [
    {
      role: "user",
      content: "Write a haiku about recursion in programming.",
    },
  ],
});

console.log(completion.choices[0].message.content);
Open WebUI
Details
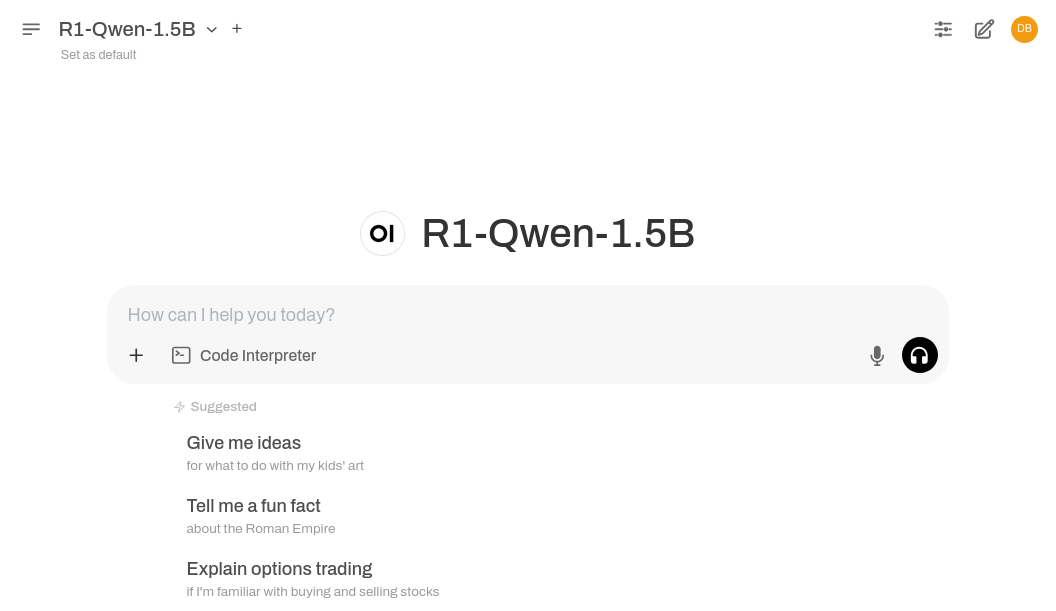
Using the Open WebUI, you can interact with the model using a user-friendly interface.
Remember to change the <nosana-job-id> with the actual job ID.
Start the WebUI locally.
docker run -d \
  -p 8080:8080 \
  -e OPENAI_API_BASE_URL=https://<nosana-job-id>.node.k8s.prd.nos.ci/v1 \
  -v open-webui:/app/backend/data \
  --restart always \
  ghcr.io/open-webui/open-webui:main
The service will be available at http://localhost:8080.
Use the Starting with Ollama Guide to add your Nosana Service URL DeepSeek endpoint to the Open WebUI.

Troubleshooting Common Issues
Deployment Fails:
- Ensure sufficient NOS/SOL tokens in your wallet, you will need a minimum of 0.05 SOL, and a minimum amount of NOS to pay for the Nosana deployment. On the NVIDIA-3090 Market it costs $0.192/hour. Make sure you have that amount in NOS.
- Verify network connectivity.
API not responding:
- Check Service URL is correct (verify
<nosana-job-id>).
CLI authentication issues:
- Confirm correct private key imported into Nosana Dashboard.
If issues persist, contact Nosana support on Discord.
Setup and Preparation
As mentioned in the prerequisites, you need to have the necessary software installed on your system.
Nosana Job Specification
This is a standard Nosana Job Specification. With this you can define how a Nosana job will operate.
The most important parameters of the job specification are:
image: The Docker image to use for the job.entrypoint: The entrypoint for the container, this is the first shell command to run.cmd: The command to run inside the container, this can be used to specify any parameters such as flags.gpu: Whether the job requires a GPU.expose: The port to expose for the service.
{
  "version": "0.1",
  "type": "container",
  "meta": {
    "trigger": "cli"
  },
  "ops": [
    {
      "type": "container/run",
      "id": "deepseek-r1-qwen-1.5b",
      "args": {
        "entrypoint": [
          "/bin/sh",
          "-c",
          "python3",
          "-m vllm.entrypoints.openai.api_server",
          "--model deepseek-ai/DeepSeek-R1-Distill-Qwen-1.5B",
          "--served-model-name R1-Qwen-1.5B",
          "--port 9000",
          "--max-model-len 130000"
        ],
        "image": "docker.io/vllm/vllm-openai:latest",
        "gpu": true,
        "expose": 9000
      }
    }
  ]
}
To read more about the Job Specification, go to Nosana Job Specification Section.
Deployments
Nosana Wallet and Funds
Nosana is powered by the Solana blockchain. All deployments on Nosana are paid by the NOS Token. To be explicit; This means you will need to load your wallet with both NOS and Sol to pay for the deployments. SOL is used to pay for the blockchain transactions, and NOS is used to pay for the deployments.
Ensure sufficient NOS/SOL tokens in your wallet, you will need a minimum of 0.05 SOL, and a minimum amount of NOS to pay for the Nosana deployment. On the NVIDIA-3090 Market it costs $0.192/hour. Make sure you have that amount in NOS for the time that you want to reserve.
Follow this link to learn where to purchase NOS Tokens: NOS token page. Of course NOS can be purchased via swaps from any Solana wallet.
NOS Token Address
Please take note of the official Nosana Token address: nosXBVoaCTtYdLvKY6Csb4AC8JCdQKKAaWYtx2ZMoo7
Posting Deployments
Posting deployments job to Nosana is easy. For a simplified version of creating a Nosana Deployment, use the Deploy a Model tool on the Nosana Dashboard.
Nosana Market
A Nosana market is the name for a grouping of GPUs. All of the GPUs types on Nosana are organized by a Solana address or their shortname: market-slug.
For a full list of available markets, please take a look at https://dashboard.nosana.com/markets. Or run the following command:
npx @nosana/cli market list
To retrieve detailed details of a specific market run the following command:<market> can either be, the Nosana market address (The Solana address of the market), or the market slug, nvidia-3090 in this example.
npx @nosana/cli market get <market>
Example
To deploy the Nosana Deepseek-R1-Qwen-1.5B job using the @nosana/cli, you will need to run the following command (assuming you have Node.js installed).:
npx @nosana/cli job post \
  --url https://template.nosana.com/Deepseek-R1-Qwen-1.5B/job-definition.json \
  --market nvidia-3090 \
  --timeout 60
Note the use of --url, this is not required, you can also pass in a job definition file using the --file flag. On the other hand, the --market and --timeout flags, are required. The --timeout flag takes the amount of minutes as input, and specifies how long the deployment will be available.
Here is an example of deploying the Deepseek-R1-Qwen-1.B model to Nosana in action.
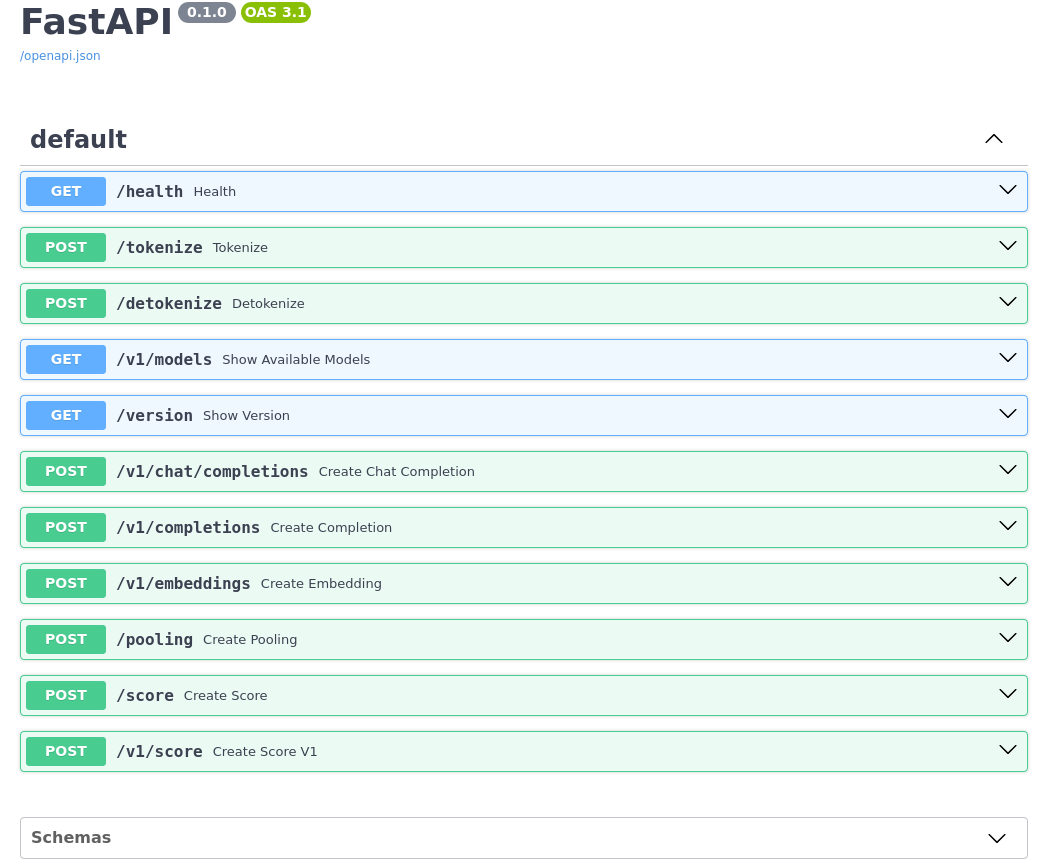
OpenAI Compatible
As mentioned in the QuickStart section, the endpoint will be OpenAI compatible. The following endpoints will be available:

Monitoring Deployments
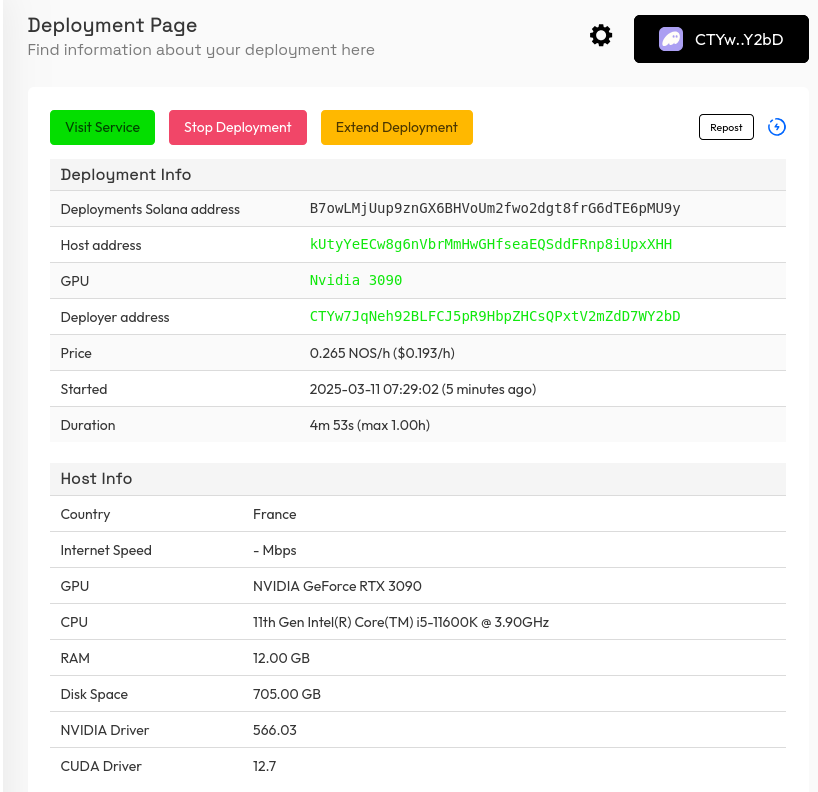
The next step of course is to monitor how the deployment is going. To check to see what the status of the deployment is, to extend the deployment or to stop the deployment.
There are two ways to do this.
Dashboard
The first is to use the Nosana Dashboard, which is the most convenient. It provides an easy to use interface to manage your deployments. You can navigate to https://dashboard.nosana.com/, connect your wallet, and you should be able to see your deployments from the My Account page. You can also navigate to https://dashboard.nosana.com/jobs/<nosana-job-id> to see more detailed information about your deployment, stop, extend, or repost your deployment.

Import @nosana/cli privatekey
To see the deployments you are making from the @nosana/cli tool in the Nosana Dashboard, you will need to import your privatekey into your Solana browser wallet. The Nosana privatekey can be found at $HOME/.nosana/nosana_key.json. The contents of this file can be imported into Phantom and Solflare, follow these guides for more information:
CLI
Of course the @nosana/cli tool can also be used to monitor your deployment.
Run the following command to get more information about your deployment:
npx @nosana/cli job get <nosana-job-id> --wait
Note the use of --wait flag. With the --wait flag, you can introspect the deployment logs.
Managing Deployments
Now that we know how to monitor the deployment the next step is to manage the deployment. This includes either stopping or extending the deployment. The rest of the guide will focus on using the @nosana/cli tool.
Stopping Deployment
When you run your job, you will have received a <nosana-job-id>, with this id we can stop the job. Run the following command to stop the deployment.
npx @nosana/cli job stop <nosana-job-id>
Extending Deployment
Sometimes, there will be a situation, where the reserved time you posted with the job will not be enough. In these cases you can extend the deployment by running the following command:
npx @nosana/cli job extend <nosana-job-id> --timeout <time-in-minutes>
Wrap Up
Now that you know the basics of how Nosana Deployments, you can refer back to the Interacting with the Model to read again how to query the model.
Conclusion
Deploying the DeepSeek-R1-Qwen-1.5B model with Nosana significantly streamlines the process of setting up high-performance AI inference services. By leveraging Nosana’s GPU infrastructure, developers can efficiently scale deployments while maintaining optimal performance and resource utilization. Whether using the user-friendly Nosana Dashboard or the powerful Nosana CLI, the integration simplifies complex tasks, allowing teams to focus more on model innovation and less on infrastructure management. Explore Nosana's intuitive tools today to accelerate your development workflows and seamlessly bring your AI projects to life.
Now that you are familiar with deploying DeepSeek R1 on Nosana, you're ready to innovate quickly and efficiently. Visit the Nosana Dashboard or explore more advanced CLI options to power your next AI project effortlessly.